-
Posts
208 -
Joined
-
Last visited
-
Days Won
27
Content Type
Profiles
Events
Forums
Gallery
Downloads
Community Map
Everything posted by strike250
-
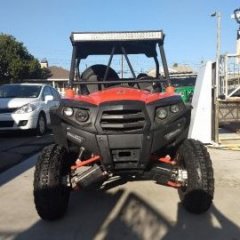
IMG_20170408_114129255_HDR.jpg
strike250 commented on strike250's gallery image in UTV Mods and Builds
I had purchased this unit as a demo, so it was used pretty hard to show it off. Also, it had gotten some oil on it from being rolled over. After inspecting the belt which was smoking after being rolled over, I removed the clutch assemblies and found the clutch pads to be worn to the point that they needed to be replaced. I also noticed that the sheaves needed to be smoothed down and cleaned due to wear from the belt. So I took this all in to consideration and bought a complete clutch assembly. I am using the original clutch to send to a performance company to see about having a high performance spring and clutch kit built. Remember, this unit is a Chinese unit, and the quality of the products are just not the same as some other products out there, so the wear and tear that they can take is far less than some other name brand units on the market. So, it is important to constantly inspect the drive train for pre mature wear. -
Hello there and hope you're having a great time with your new unit. As to the problem of having a trailer hitch, it has to do with where to mount it. As you have noticed, these units have a solid rear axles. Due to their mounting there is no frame area available to mount a traditional trailer hitch. I have had these units down to the chassis and there are really no great places to mount it to. The rear axle is exposed and does not have a housing. The swing arm is about your only option here. You would have to fabricate a bracket from one side of the swing arm to the other and that also perhaps has a strut in the center to attach to the swing arm as well for support. Then you might be able to bring it out rear wards and have your trailer hitch then. I happen to be a mechanical engineer as well so this is just my 2 cents. Is it impossible? no, is it available currently? no. Any good welder and fabricator can make it happen though. Probably some good ol 3/8" plate and you're there. As you can see from the pic below, not a lot of area to mount one to. But there are lots of mounting areas at both swing are to axle points. Matt
-
I can understand about not spooling correct, it does need to have some resistance against it when spooling back on, and I do not use mine here in southern california. I mostly use it in the desert, in fact I hardly use it at all as I dont really get this little 250 stuck really. But for the amount of time it sits not being used, the synthetic rope is better as it better quality than the cheap steel one installed at the factory, and I have known first hand about getting a broken strand stuck in my hand when winding it in and it is painful. The other side is that the steel cable tends to remember the winch wind, and gets twisty after time, like a corkscrew. For your application with the snow plow, I would either get a much higher quality version, like one recommended for a jeep, or either go back to a steel one, but use again a higher quality one. By this I mean one impregnated with lube inside. I say this as a former crane mechanic, and I know wire rope. You just have to find out the hole diameter in the winch spool where the wire goes, and then look for a high quality wire rope. It is easy to install yourself and there are many videos on youtube for you to watch on how to install. If you get a high quality wire rope, one with lube inside (lube in-between the wire strands) it will last a long time. And I would also lube it up, yes lube your winch cable up every couple of years. Again, there are tons of videos showing how to do this. Good luck on your new Mule, would love to see a pic of it. Matt
-
Well my unit is well out of warranty, but most of my problems have been minor. Mostly loose nuts and bolts and the main gauge is not working properly. But like any manufacture they all offer very limited warranty due the off road nature of them. Lucky me I am a master mechanic and happen to be able to repair most of the problems myself. I really don't have a dealer near me that makes it easy to take it to. Having to do a lot of the repairs myself has also taught me alot about the Hisun UTV's. Overall I am happy with the product and performance. I knew going into it what I was getting into and really have no regrets. Glad you were able to work things out. if you ever have any questions, let me know and I'll be happy to help you out.
-
I can totally understand your frustration, believe me. But I bought the brother to the the Hisun Strike 250 and have had nothing but good times. Great no, but lots of fun times. You have to remember every manufacture has good and bad products. This goes for cars and trucks as well. I have heard of Honda Accords breaking down the day they were bought, and don't forget the bug money name brands $25k plus UTV's out there burning down in the dunes just after a few days or weeks. I do not work for Hisun, nor am I getting any kind of benefit from this. This is just my 2 cents. I have owned over 50 different makes and models of motorcycles, UTV's and ATV's. I knew going into this purchase that it was a Chinese version, but bang for the buck, It just couldn't be beat. I took it home and from the start I took it down to the chassis. I found a lot of loose nuts and bolts. I also found a lot of things I thought the factory should have done differently, like route the wiring in places and so forth. What this did was make me very aware of the shortcomings of this unit, and accept them. It also made me aware of what this unit was capable of once it was properly maintained. After going over the entire unit, we have had pretty much trouble free fun with every outing. I have replaced many bolts with higher quality ones, and made some mods that I knew to improve the performance and operation of the unit. I think your unit had a big quality control issue from the factory, and it was not the fault of the dealer like you said. The units come pretty much assembled less wheels and a few bolt on items. The dealer un-crates the unit, bolts on the items and fires it up. I believe you might have had a linkage issue or perhaps a clutch issue. Both of which are repairable, but in your situation I can understand the frustration. Keep in mind as well, all off road makes and models have very limited warranty due to the harsh conditions they are ridden in. This is no excuse for how yours ran at all, and it should have given you some fun prior to crapping out. I hope you were able to find something that your young ones enjoy and are pleased with it. With any make, keep up the maintenance and you will have endless weekends of fun for the family. Matt
-
Hello there, Here I hope to help those who have not yet replaced their CV belt on the Hisun Strike 250. I have done this and found the short cuts for you. It is not a 5 to 10 minute job, so if you ever find that you need to replace the belt, get ready for some work. 1.) First off remove the seats, they are easily removed by sliding them forward until they simply come out of the tracks. 2.) Second, remove the seat track brackets and put them aside, this is to access the lower cover and battery box. 3.) open the battery cover and disconnect the battery. You should remove the battery at this point and place it in a safe area. 4.) you will need to remove the two covers on the right and left inner rear fenders. They are forward of the rear wheels and they will give you access to some vital areas. They are held in by some phillips screws and at least one 10mm nut. 5.) pull the battery wires out of the battery trey, also at this point disconnect the ECU and the regulator. The reason for doing this is that you will have to remove the large plastic cover under the seats and engine. Don't forget to remove the engine cover, it is held in place by two plastic turn screws. I have included a pic of the plastic area for you to better understand. Item 19 is the battery cover, Item are the two rear plastic covers by the rear wheels that need to be removed. Item 16 is the actual engine cover, and item 22 is the large plastic lower cover that needs to be removed to gain access to the engine, cover and fuel tank. 6.) you will need to undo the lower 4 point harness points and simply flip the seat belts back into the rear cargo area. 7.) USE CAUTION WHEN REMOVING THE LARGE LOWER COVER!!! it is brittle and will crack or break with little effort. ( trust me I know ) After you remove the large lower cover and wipe the sweat from your brow lol. you can now gain access to the engine, the clutch cover and all the needed parts to remove the CV belt. 8.) You will now need to remove the cross over bar that the seat belts were connected to. It is held in place by two 10 mm bolts on each side. Note: you will have to fiddle and find a way to get it out from behind your intake. I simply removed the two bolts holding my throttle body down and then covered the intake tube to prevent anything from getting into the engine. I had to also remove the throttle cable as well. You will need to do this in order to get the fuel tank out of the way. This is the ONLY way to get to the CV belt cover. I have tried many ways. 9.) The one thing I did do at this point, is take the large lower cover and cut it in the middle. This did a couple of things for me. It make removing and replacing it easier, and it also make it so I only needed to remove one side at a time if I so needed. It has not caused me any problems since. I cut it right along the edge of the center on one side. Just my 2 cents here. 10.) At this point, you'll need to remove the two bolts holding the fuel tank in place. Take care to understand, if the tank is full, you might have to remove the right side cover, as you cannot remove the fuel tank with the fuel cap on as the hole is not large enough. And pulling on the plastic might end in a broken part. You will not have to disconnect the fuel line, as you are only pulling the fuel tank up and out enough so that you have access to the clutch side cover. NOTE: take pictures if you are not real sure of how things go back together. This always helps. 11.) go under and remove the skid plate covering the rear engine area. this will give you access to the lower bolts needed. This would also be a great time to do an oil change, as you are already there. 12.) With the fuel tank up and out of the way, you know have access to the right side clutch cover. FINALLY! You can now remove the 10mm bolts holding it on. 13.) Now, following the factory manual, you will need to insert two 6mm threaded bolts and screw them down on the rear clutch face. There are two threaded holes on the face. This will force the clutch open and allow the belt to relax in its position. Now, with it loose, the manual says you can simply slide the belt off and replace it with a new one after inspection. I have found that this is not the case at times. I have had to at times remove the forward clutch assembly. As it is easier to access the 17mm nut than the rear one. Once I pull the front clutch off, the belt came right off! WHEW!!!!!!! 14.) Now, just replace the belt and do everything in reverse lol. I know it sounds like a lot of work, and believe me, it is. But it does a couple of things here. One, you won't need to replace this belt very often as there is not a ton of torque on it. Second, it gives you a great knowledge base of your unit, and having this is great when you are out and something goes wrong. Third, if you find anything loose from the factory or not in spec, now would be the time to correct it, now when you are stuck in the dunes or in the back woods. All in all it will take a couple of hours to knock it out if you know what you are doing. I would plan on an nice Saturday or Sunday to get this done as it does require your time and energy. I will post some other how to files soon, if there is anything you would like to see, just let me know and I will try to do that first. Matt
-
- 1
-

-
Hello there again, Just some more advice to those owning these fun machines. We rolled our unit during testing out at Dumont dunes, no one was hurt and the unit was pretty much un damaged. But some things to watch out for that I have learned. One; after being upside down, check the oil level, some oil can leak out of the crankcase vent tube casing the oil level to become low. This in return can cause damage to the engine due to lack of proper lubrication. Second; Oil can leak back into the CV belt cover since they share the shame ventilation tube as the intake, and as oil can return into the intake after a roll over, it can in reality seep back into the CV belt case. this would cause the belt to become saturated with engine oil. We noticed our unit smoking some after being rolled over. Upon inspection, we found the CV belt to be wet with oil. As a result we needed to replace the belt early. Also it might cause your clutch pads to become wet with oil, thus causing the clutch not to work well. I found a lot of burnt off clutch material on the CV rear cover only after removing the entire clutch assembly. So, as a person who has already experienced this first hand, I am just saying to check things if you ever do roll it over, it will save you time and money later on. It is not easy changing the belt, trust me.
-
Another spot to check out is the OEM chain, it is not the best quality. I understand during manufacturing you make thousands of these things. To meet certain price points you have to use a quality that meets your requirements, but is not always the best due to price. I would recommend replacing it with a nice O ring chain. A good quality chain will make your sprockets last longer as well.
-
Hello there, just a note to those owning these fun machines. Remember to remove and lube the front A arm bushings. They are plastic from the factory and are pretty dry if any lube at all. To make them last, I would take them out and lube them up well to make them last and work well. I am trying to source some aftermarket bushings, and think I have found a source, but working out the details, so in the mean time, R&R those plastic things sooner than later, or you'll regret it.
-
-
From the album: strike250
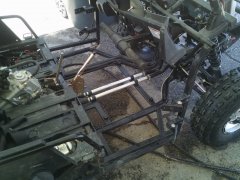
Here is another pic of the naked chassis showing the front part area. -
From the album: strike250
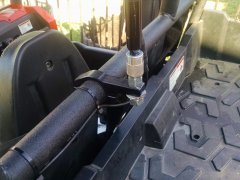
Here is the lighted rear flag mount we installed for the dunes. -
From the album: strike250
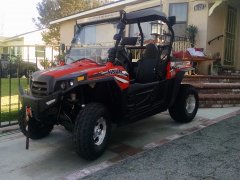
Here she sits all ready for war -
From the album: strike250
Here we replaced the wire rope with synthetic rope on the winch. -
From the album: strike250
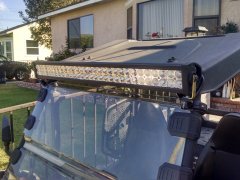
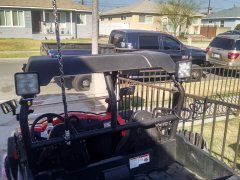
Here is the front light bar installed on our Hisun strike 250 -
From the album: strike250
Here are some rear strobe lights installed on the Hisun which really helps in locating the boy when he is far away in the dunes. -
From the album: strike250
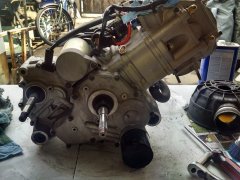
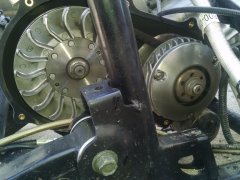
Here is a pic of engine out of the chassis. Here you can see the Right side of the engine with the clutch completely removed for replacement. -
From the album: strike250
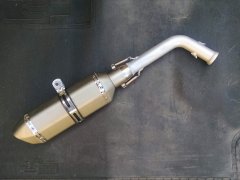
Here is a pic of our exhaust system that we manufacture. It not only works great, but it sounds amazing. It flows so much better than the OEM as well. -
From the album: strike250
Here you can see the OEM clutch assembly on the Hisun Strike 250. It is one of the hardest clutches to get to and service. Just to replace the CV belt you need to do a lot, even remove the fuel tank. We have found it almost easier to just pull the engine lol. We also go ahead and service the engine, valve adjust, oil change, coolant flush and such. The engine is only held in with 2 14mm bolts. -
From the album: strike250
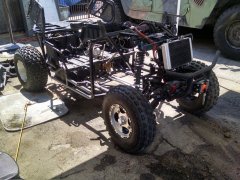
Here is a pic of the chassis on the Hisun Strike 250. As you can see, we really know this UTV! We know what works and what needs to be replaced. Please feel free to ask. -
From the album: strike250
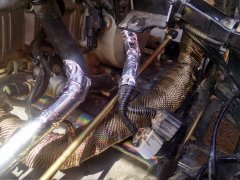
Here is a close up view of the exhaust header with the heat wrap. -
From the album: strike250
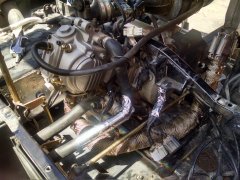
Here is a view of the engine compartment on the Hisun Strike 250 with the floor removed. You can see here where we wrapped the exhaust header with heat wrap as well as some of the coolant hoses to prevent heating issues. We also wrapped some of the electrical wiring to prevent any heat from getting to them. -
From the album: strike250
Here is a view of the front 2" lift kit. It uses all of the OEM suspension and is completely bolt in. -
From the album: strike250
Here is a side view of the custom exhaust system we manufactured. It works amazing and sounds even better. -
From the album: strike250
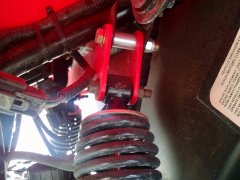
Here you can see the rear lift kit brackets. It uses all of the OEM suspension.


