


-
Similar Topics
-
 By BigWave
I turned off the key and then tried to start it a minute later and it would not start. I changed out the fuel filter and the injector. still nothing. if i have the injector pulled out and close to the hole the injector will spray fuel into the hole and it will run but the minute you put the injector in it will die. any idea's please
Bigwave
-
 By Kevin Ullman
View File 2015 Polaris RZR900 Service Manual
2015 Polaris RZR900 Service Manual
Submitter Kevin Ullman Submitted 04/23/2025 Category Polaris
-
By Kevin Ullman
View File 2013-2016 Polaris RZR 570 Service Manual
2013-2016 Polaris RZR 570 Service Manual
Submitter Kevin Ullman Submitted 04/23/2025 Category Polaris
-
 By Mike Jenkins
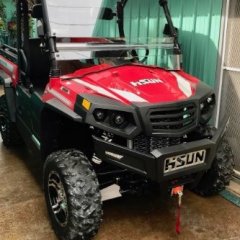
I have a 2013 Hisun with a 686 Yamaha engine.
I purchased it from an individual and it ran fine as long as the battery was full.
I replaced the stator and now it will not start (run). It cranks fine, has fuel pressure, but will not fire up. I replaced the coil, no luck there.
a technician told me that it was the wrong stator and wants a mint to replace it.
the wires all plugged in when I installed the stator.

-
 By HighSon
This mod is not for the fainthearted, as it requires some basic metal fabrication and welding skills. But the result is worth the effort IMO. I chose an aftermarket Honda Talon windshield based on economy, size, and construction (aluminum frame, DOT glass, folding, windshield). It fits OK, a little narrow at the top, and you need to incorporate the lower section of the original acrylic windshield and build some additional plates, but better than being too wide. If you are wondering why I attacked this mod, it's because mine is driven daily on the street. Tired of fading, scratchy, hazy plastic. Sucks in the rain; sucks at night. Now I can see.
-


Recommended Posts
Join the conversation
You can post now and register later. If you have an account, sign in now to post with your account.
Note: Your post will require moderator approval before it will be visible.