Quantcast
Jump to content


Recommended Posts

Posted

BeforeIMG_20180512_094554_hdr.thumb.jpg.d67cdf2bea16b6c07af5c3783b006064.jpg

Crank un-installedIMG_20180512_100522_hdr.thumb.jpg.687092d12daebf03c59f08011e6605a9.jpgIMG_20180512_105612_hdr.thumb.jpg.c50b17d97adfc169f2b4df6ce3f1739d.jpgPiston INSTALLED after honing.IMG_20180512_104525_hdr.thumb.jpg.76de4e56ad2c0afbf0aa245bd4ea222c.jpgCrank installed after honing.


Last pic is honed.IMG_20180512_101517_hdr.thumb.jpg.c9d0dc0dd9d90357f6309d6726b3a6b8.jpg

Kind of blurry, took it with one hand. It looks better in person. It may not be professional quality but im 99.99999999999999999% sure it will work.

Did better than I thought i would.


So now, only ONE more obstacle. the crankshaft axial play adjustment BUT

I need someones opinion ( i took the piston back out afterwards) not sure if you can see it, but in the picture with cylinder honed, it's almost right where the  glare from the light is, and on top of the cylinder directly across from the spot, it looks like the hone didn't get ruffed up.  any ideas? out of round cylinder, cylinder wore and needs bored??


  • Like 1
Posted

Need to get y'all a picture of the honing job  Ted's did. A work of art!

 When i went there, the machinist asked me what grit stones i was using, all i new it said was "medium grit" from the parts store. He said it was too rough for honing. and i might have broke or wore my rings pre maturely.

Posted

Need some ideas. the "left main bearing" in the crankcase, where the shaft sticks out, where the flywheel mounts, in the crankcase  it has a non replaceable bearing. If it is wore too much, you have to replace the entire crankcase. Im going to measure it later, (from a visual it doesn't look too wore) but i was wondering if i could buy a ball bearing and put in it IF it is wore past the service limit?

Posted

Measured the bearing, its good. BUT, i need a new camshaft, the journal that rides in the crankcase cover is wore past the service limit. New is $122.00. I contacted a guy about used one to see if he measured the specs.

  • 3 weeks later...
Posted

Took the camshaft and crankcase cover to the machine shop. (the cam journal and crankcase bearing for the cam were wore some) and the machinist said not to worry about it. still fits real tight, and has minimal play.

 And i too notice no score marks on the cam journal or inside the bearing. so i just saved $300 bucks.

:D

  • 4 weeks later...
Posted

I was going to order the shim from KPH, but they dont keep them in stock, so they would have to order it from Kawasaki, then when it arrives at their location (Michigan) they ship it to me. that would take 2-3 weeks. then a rare occasion happened, I had a thought.

 Pro Powersports here in Conroe  is a Kawasaki dealer, so they are going to special order the part for me, and can have it here within 10 days. 👍

  • 2 weeks later...
  • 3 months later...
Posted

UPDATE:

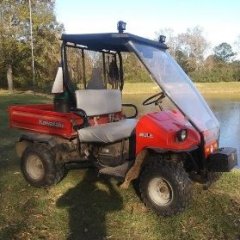
I've been so dang busy lately, i finally got a couple of hours to work on the jacka$$... i mean Mule..😉

Got the rod bolts torqued, pulled off the oil pump/tang installed the cam and timed it it to the crank, put the cover on, and for those who dont know or remember the ordeal with the crankshaft and cover:

There is a  shim between the crankcase cover and the crankgear, this helps control the end play, or side to side movement of the crank. anyway, the first time i installed the cover the crankshaft would not spin by hand (according to the manual its supposed too)  so i measure all the clearances  (according to the manual instructions) and came up with the correct size shim. so back to TODAY.

 I installed the new  shim (VERY easy)  slid the cover on, put the new bolts in, torqued them and the moment of truth,  the crankshaft spun by hand,which is what i was looking for!

 So now all i need to do  is install the head and set the valve clearance.

and for anyone else rebuilding any engine,  i do not recommend using Permatex  assembly lube, it is  very slick and not tacky, it runs of the parts easily, so i bought some Lucas lube, and it's slick, but tacky enough it held onto the  surfaces.

https://www.amazon.com/Lucas-Oil-10152-Assembly-Lube/dp/B000WJ3M6I


Posted

I put the crankcase cover bolts on the torque specs are 250 in ibs. my torque wrench only goes up to 240 inch ibs.,

am i okay leaving it at that, or should i go to harbor freight and pick up one,  i looked and they go up to 250. ????

Posted

Hey Travis! Hope y'all had a nice Thanksgiving. Sounds like you're almost ready to get that thing going!

Have you given any thought to converting to foot pounds, and using a different/larger torque wrench? I'd probably just give em 240in. lbs. and be happy with that. I can't imagine there'd be a problem with that method. The important thing, as I see it, is that their all the same tightness, without being tight enough to strip those aluminum threads. Maybe add a little of the blue thread locker. 

  • Like 1
Posted

I think I'm gonna leave em  at 240 with blue locker.

But  now I need to torque the flywheel nut, 63 foot pounds.

And that comes out to 756 inch pounds. I might stop by harbor freight and pick up one of their $20 torque wrenches.

They have a 3/8 drive from 5-80 ft pounds.

  • 2 weeks later...
Posted

I installed the new valve tapper and adjuster.

 Put the valve cover on, (torque spec, 130 inch pounds on the  2 bolts)  I set my torque wrench to 130,  and S N A P.    :(   so i take the valve cover back off, and see the broken bolt, Thank the good Lord Almighty it broke off just before it threads into the head, and it was enough to get my needle nose on and back it out, luckily i had kept the old bolts, so put a new o ring on one and tightened, but this time as tight as i could with a regular ratchet.

 I still need to torque the flywheel nut, it's kind of hard with one person, to keep the crank shaft from spinning while tightening it.

 Any suggestions?

Posted

Couple of things here. First, the valve covers on my car are in the 7ft. lbs. range. Very similar. You said that you tightened it as tight as you could with a ratchet. 7ft. lbs. would be about as tight as you could do with a nut driver. So a quarter in. ratchet would still be medium tight.  Second, don't ever use pliers of any sort on anything that's stripped. Vise grips will work best. In this type of situation, go for the win on the first try, because sometimes there's not a second chance. If the pliers slip, they'll just make the job tougher. Since it all worked out, no harm done, and good job!

Now, on to the flywheel, and keeping things from spinning. A simple trick from back in the day could help here. Try feeding a rope through the spark plug hole. Fill the cylinder up with rope, and leave it in place. Obviously you'll want to leave enough rope hanging out, so it can be removed afterwards. This will GENTLY bind the piston, so it can't cycle. Use a good rope , that won't leave tiny rope bits. And try to coil it into the cylinder as it goes in. 

It's been a long journey buddy, and now you're getting close to the end. Don't forget why you came this way, instead of taking the easy way, and just paying the money. The things you've learned here will serve you well, throughout your whole life. Really...its a small price to pay for that kind of education. Keep those pictures coming!

  • Like 2
Posted

I tried vice grips at first on the bolt, but the way the it broke it left a peak, or a point on top, and the grips wouldn't clamp it.

Good idea with the rope!! I will definitely try it. I was able to tighten it a little bit more, but not to spec yet.

I built an "engine test stand" (square piece of ply wood i drilled holes through to mount the engine) so i can fire up and make sure everything works/is in working order out side of the frame, so i don't install and it blows up on the first stroke.that would be my luck. lol.


You've given me a lot of good advice and i appreciate it a bunch!


Merry Christmas!

Posted

I've seen those vise grips slip before, so I know what you mean there. But if it came out with a pair of pliers, then it wasn't in that tight. If you're going to work on equipment you'll need the good stuff. Old school vise grips, are manufactured by Peterson, look for those, not that Irwin crap. Otherwise look at Milwaukee brand, sold at home depot. There's a big difference in success on those specific vise grip jobs, when you're using the good stuff. Collect good tools now buddy, and take care of them, the future is pretty bleak for quality tools. So always keep an eye out for the good stuff.

Posted

I have a 48 piece kobalt socket set, and 20 or 24 piece craftsman wrench set, and kobalt screwdrivers.

I heard dewalt -Stanley black &Decker are building a forging plant here in the US to manufacture Craftsman tools.


Posted

Nice start on the tools. But you need to keep on the lookout for the good stuff, at pawn shops, and garage sales. They're not making the good stuff anymore. Even snap-on is watering down their game.

Posted

For a little eye candy, on just what is possible. If you've got the eye, and the talent. Check out the garage journal forum. Look specifically in the tool section. There's a fellow calls himself nine four GMC. Sorry I can't link it, but his threads are well worth the trip. Pure talent right there.

  • Like 1
Posted

I've also been in the market for an air ratchet, i do a little tinkering with lawn mowers, need something a little stronger than my B&D drill, but still can get bolts and nuts tight quicker, and be nice just to have one.

Posted
5 hours ago, kenfain said:


Now, on to the flywheel, and keeping things from spinning. A simple trick from back in the day could help here. Try feeding a rope through the spark plug hole. Fill the cylinder up with rope, and leave it in place. Obviously you'll want to leave enough rope hanging out, so it can be removed afterwards. This will GENTLY bind the piston, so it can't cycle. Use a good rope , that won't leave tiny rope bits. And try to coil it into the cylinder as it goes in. 


What size rope would be best?  I saw a video on youtube of a guy using  trot line size rope, would a lead rope work better, or Paracord?

Posted

HAVE YOU SEEN WHAT AN IGNITION COIL COSTS FOR MY MULE!!!!??????

OEM brand new, 95 bucks! I've bought ones for lawnmowers for $15. crazy!

Now there isn't anything wrong with mine, except it's 16 years old and could go just like that.

Create an account or sign in to comment

You need to be a member in order to leave a comment

Create an account

Sign up for a new account in our community. It's easy!

Register a new account

Sign in

Already have an account? Sign in here.

Sign In Now
  • Similar Topics

    • By Jacob E freeman
      I have a 2018 cub cadet challenger 750 I bought brand new almost 2 years ago the first month I had it the exhaust broke and burnt the spark plug wire in two that was a recall so the dealership installed the new one it had a different design and it bolted up to the bottom two plugs below the spark plug the dealership said they had to Adjust the exhaust valves I get the machine back thanking everything is good now wrong not even a week after I get it back the timing chain tensioner comes apart inside the motor I take it back to the dealership They put one on I get the machine back thanking everything is good but then just like before not even a week goes by when I was riding the Machine automatically quits going come to find out the wet clutch was burned up the primary clutch head stripped off of the splines I get that fixed and then  it overheats I take it back they bleed the air out of the coolant they bring it back to me the same day that I get it back it overheats again I take it back they temporarily fix it again just enough to let the warranty run out and now the machine has been to multiple different mechanics I have had them try to bleed the air out they have stood it up on its end I have had the water pump changed I have had the fan hooked to a switch so I could leave it on all the time but still almost 2 years later not even 200 hours on the machine and I cannot ride it The dealership will not take it back as a lemon I have tried I am at my wits end I have no clue what to try next
    • By Greg Kilgore
      Last year bought a small universal coolant style cab heater. Well I installed it today. Thanks to another member, RangeRider45, and his install
       
      That told in his post the size fitting he used. I got the same fittings plus a few others. And all went kinda smooth. Took a few minutes to get air purged from coolant system. Should have parked on hill with front up in the air. But would have had a hard time working on it.
      I had a variable power switch connected to an overhead cab fan. Never really used the fan that much. And I have to remove the fan to put on my cab enclosure anyway. So I repurposed the switch to supply power for the heater. The heater has 2 12-volt DC computer fans that are rated for 1.8 amps each. So it's not going to be a big drain on the weak charging system. And with the switch I've got great control over the speed of the fans.
      If anyone is interested the radiator hoses are 7/8 inch. I reworked the temperature sending unit (moved it closer to radiator) to make room for all the extra plumbing I did to get the heater to work the way I wanted. 
      Plumbing parts list.
      10-15 worm water clamps. 3/4 to 1 1/4 inch size.
      2 1" x 3/4" x 1" PEX Tee
      1 3/4" PEX ball valve
      1 1" PEX ball valve
      5/8" heater hose. I got 6' and probably have 4' left over.
      I used the radiator house I cut out to use as splices between the PEX fittings. The PEX fittings are not true to their dimensions that are stated on the package. So they fit the 5/8" and 7/8" very nicely.
      They way I have it plumbed is from radiation out side. A tee, then the 1" ball valve, then a Tee. Coming off the Tees are the hoses going to the heater core. There is a 3/4" ball valve on one of the Tees. The ball valves are used to bypass the heater core in the summer. Or direct the hot coolant through the heater core in winter. The temperature sending unit tells me how hot the coolant is. And if anything is getting too hot. The dash also has an idiot light that comes on if the head gets too hot. But doesn't do anything if the radiator gets too hot. There is a temp sensor on the radiator that controls the electrical fan. But if the coolant isn't circulating. That switch never sends a signal to turn on the fan. But enough talking/rambling. Everyone wants to see pics. The only thing I need to change is the orientation of the handle on the 1" ball valve. I have 2" or more clearance between the handle and the tire when cut hard right. But I still don't like it. And instead of taking the valve out and rotating 180°. I'm just going to take the nut off and rotate the handle 180°. Think I need to make a locking mechanism to lock the handles in place so they don't vibrate closed when the machine is moving.
      The temperature sending unit and housing. Size 22 mm. Aluminum from Amazon.

      Upper Tee the lower Tee is identical. Can also see the handle of the 3/4" ball valve on the 5/8" hose going to the heater.

      The 1" ball valve. Goes between the 2 Tees

      Wide view of the plumbing.

      The heater installed in the sxs. The 3 black hoses are just hanging there. Zip ties to the heater but not attached to any thing. Will probably just direct 2 toward the wife's feet. And 1 toward mine. Or what ever is need as the heat is needed on rides. The black hose in passenger floorboard is some 1" hose that is not needed. Don't know what I'll do with it.

       
      I think if I was going to do it again. I'd put some Indian Head gasket dressing or silicone on the 1" side of the PEX fittings. And I may still do that. But I really hate the ideal of introducing air back in the coolant system.
       
      Any questions just ask. It may take a while to answer. But I'll try.
      Ya be good and stay warm over the next few months 
       
      Kilgore.
    • By TPlummer
      We recently purchased the Axis x550. Fueled it with 93 fuel and drove one time around the farm and the 02 fault error appeared. Any ideas? 
    • By owencole15
      Massimo 500 will only crank when I jump solenoid with screwdriver cranks right up and runs great. But won’t start with key doesn’t do anything when I turn the key. Only thing it does is power everything as in dash and fuel pump then have to jump solenoid to crank up and drive. 
    • Get More For Your Device
    • By Hugh
      My 2018 Hisun sector crew engine cut off after about 15 minutes run. There is no indicator of what is wrong, no error code just die and won't restart until it cool down. I notice that the fan is not running but the temp indicator is on low temp, no overheat indicator. I checked the radiator fluid, it is cool to touch.
      Cooling fans are working, I can hear it running once awhile if I can get the engine warm up enough.  Thank you for all the help.
       
      Hugh
×
×
  • Create New...