Quantcast
Jump to content


Recommended Posts

Posted

2307330740104282158epPNJg_th.jpg

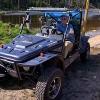
Just changed dirt proof boots on steering box. Some lessons I learned are

1. When you start, crank the wheels hard in one direction and measure the distance (TRAVEL) from socket to the stop and write it down. If you increase the distance a little, you will get a tighter turn radius but you will probably start binding up in the CVs and if you change it, you will need to realign your front end / toe in which is .98 inches.

2. You will see the gear rack move up and down and this gives you some play in the linkage, go to Ebay and enter 200302043085 . Some edit deletions here.

3. Now the laser alignment, sort of, Center you steering wheel, If this type of thing is important to you, Center the gear rack as best you can, you may need to rotate the spline connectors, then turn the forks in or out until 1/2 of the travel is at each end and the hooks are level, spin the steering wheel to check, tighten the jam nuts, and hook up the tie rod ends and tighten the bolt going through the forks, real tight, there is play here also and tight get rid of it.

NOW

Hang a piece of card board or something similar across the back that extends out past the rear wheels about 4-5 inches. Shine a flash light from as close to the side of the front wheel toward the back and mark the shadow cast by the rear wheel, both sides. Now shine a laser pen from the front of the front tire across the back of the front tire and mark where it hits the card board, the beam should just barely be visible on the front side of the front tire.

This should give you an idea of where thing are and you can start making adjustments, rock the buggy back and forth after each tweak before retesting.

Jack the front wheels off the ground, have someone hold the steering wheel hard against the stop, force the wheel out against all play and turn, feeling for any hint that the CV may be binding, on both sides.

Make sure you got all the jam nuts jammed.

Kinarfi

Posted

Kinarfi, when shimming the top of your steering rack, if you use polyethylene, it makes an excellent bearing material and it won't break when you bend it. Another thing you may want to consider is to put a peice under the entire aluminum cap and then put about a 7/8" wide strip between the aluminum plate and the peice that covers the entire plate. When tightened down it wil bow the full plate peice down against the rack removing the play. This way you won't need to bend the ends up as the strip cannot slide out becauses it's not touching the rack. This way you could actually use metal shim stock for the strip allowing you to loosen the cap and slide in a heavier gauge as the poly wears.

Do you know what the camber and caster settings should be for the Trooper and how do you measure them. Also you said the tow in snould be .98", where do you measure this. Is that the difference between the measurment between the front sides of the front rim and their rear side? I'm getting ready to dive into my front suspension with fox shocks. Yea, frame cutting and all. I'm thinking about lowering my front diff. flatbed warned me that unless I change a loot of suspension points that I would produce bump steer so I'm going to have to watch things real close.

flatbed, I know, you warned me. I suspect that by this time that you are starting to figure me out. The more I'm not susposed to delve into something, the more driven I am to try it. When I was a kid,I swear that some of my projects had more weld material in them then stock steel because of all the changes Iwould try. I've learned a lot by heading down the wrong path.

By the way kinarfi, I don't use jam nuts, I use peanut butter nuts.

Lenny

Posted

Don't know caster, camber settings, toe in is in the manual and the way I learned it is jack the wheel off the ground and have some spin the as you draw line with a pen on the high points of the tread and measure the distance between the lines as high as possible with out bending the tape measure on the back and axle high on the front and find the difference. Adjust for .98 inches toe in. The manual says measure while on the ground.

kinarfi

PS got some requests in for info with Joyner & No Limits

Join the conversation

You can post now and register later. If you have an account, sign in now to post with your account.
Note: Your post will require moderator approval before it will be visible.

Guest
Reply to this topic...

×   Pasted as rich text.   Paste as plain text instead

  Only 75 emoji are allowed.

×   Your link has been automatically embedded.   Display as a link instead

×   Your previous content has been restored.   Clear editor

×   You cannot paste images directly. Upload or insert images from URL.

  • Similar Topics

    • By Prepper
      I'm working with a 2015 MSU-500.  Basic symptoms are it cranks well, but will not fire.  It has spark, and it has fuel spraying out of the injector (and spraying starting fluid into the throttle body and plug hole makes no difference).  It has compression.  I bought it not running, and no other information was available.  It has 775 miles on it and 127 hours.  It looks to be in very good shape.   Previous owner replaced fuel pump, ECU, coil, plug, and the fuse/relay box that mounts on the firewall, then gave up.
      My questions relate to cam/valve timing, considering the symptoms and diagnostics so far.  My thinking was the woodruff key sheared off and the crank spun, making it out of time.  My question is, by the pictures attached does anyone have an opinion as to the cam/valve timing being correct?  In the crankshaft picture you can see a timing mark visible.  In the camshaft picture I have arrows directed towards what I think are timing marks (which appear to be exactly 180 degrees from one another).  However, the long arrow in what appears to be bolt configuration in line with the piston/rod line.  Here is a puzzling note... in the position you see in the pictures... I have valve lash on both the intake and exhaust.  I think it's at TDC, given the visible crank timing mark and valve lash on both valves. 
      Any thoughts ?  Does this appear to be in proper valve time ?  Have I missed anything simple ?  Thanks in advance for your input.


    • By A P
      Hi
      I have a 2022 hisun sector eps 550. 30amp fuse is blown for eps. Checked the motor and it’s fine. Opened up the controller and found a bad diode. Dealer wanted 500$ for the controller. Just posting this in case it helps someone. I couldn’t read numbers from the old one so just took a guess and replaced it with a 100v 3amp diode. 
    • By Matthew Smith
      2013 Bennche Bighorn 700 EFI
       I just picked up this project that I was told would crank, but not start.  This is what I’ve figured out so far….
      I installed a new battery and get all dash lights, head lights, and brake lights on when turning the ignition on.  Fuel pump even turns on.  It does not crank with the key, but would when I jumped the starter solenoid, so I replaced it…..no change.
      Figured I’d check for spark and compression while I was dorking around.  Compression is 150 psi, but there is no spark.  Replaced the spark plug… no change.
      So, is my new starter solenoid bad?  Could it be the brake or gear position switches even though the brakes and neutral lights come on?  Not sure where to go from here.


    • By carl baney
      have a 2021 tracker 800sx noticed locks on box when u fasten both sides of box are cracked anyone else have this probl
    • By Frank Mac67
      My Axis 500 has been operating properly for almost a year with Zero problems. While I was away my granddaughter & friends were riding & playing in the snow. They went to the gas station to fill the tank & the vehicle would not start afterwards. I BEEN GIVING MULTIPLE STORIES: The ATV will not start. When I turn the key I can hear the fuel pump come on but nothing happens other than that. 
      - NO CLICK - NO OTHER NOISE
      *I CHECKED THE BATTERY 12.43volts
      *I replaced the solenoid inside the battery compartment. 
      Seems the next electrical component in line has battery connections IN & motor connections OUT with 2 other small wires connectedaswell(I do not know the name of this component).
      Can anyone help?
      I can not find an ordered list of electronic components starting at the battery.
      Can anyone help with this?
      Thanks in advance for any help.
       
×
×
  • Create New...