


-
Similar Topics
-
 By Mike Jenkins
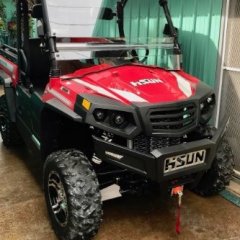
I have a 2013 Hisun with a 686 Yamaha engine.
I purchased it from an individual and it ran fine as long as the battery was full.
I replaced the stator and now it will not start (run). It cranks fine, has fuel pressure, but will not fire up. I replaced the coil, no luck there.
a technician told me that it was the wrong stator and wants a mint to replace it.
the wires all plugged in when I installed the stator.
-
 By HighSon
This mod is not for the fainthearted, as it requires some basic metal fabrication and welding skills. But the result is worth the effort IMO. I chose an aftermarket Honda Talon windshield based on economy, size, and construction (aluminum frame, DOT glass, folding, windshield). It fits OK, a little narrow at the top, and you need to incorporate the lower section of the original acrylic windshield and build some additional plates, but better than being too wide. If you are wondering why I attacked this mod, it's because mine is driven daily on the street. Tired of fading, scratchy, hazy plastic. Sucks in the rain; sucks at night. Now I can see.
-
 By didgeridoo
Hello, All! I've decided to replace the traction batteries in my 2018 Sector E1 with a 48V Lithium set. They may be expensive, but I figure the Discovery Dry Cell are, too. I am not looking for the max driving range, as I have never received near the brochured range to begin with, but a good mix of charge/ get work done/ charge is what I am expecting.
I have settled on the 48V EAGL kit from bigbattery dot com. Each battery pack provides 30Ah. The kit ships with a charger, as well. The packs would be physically connected in parallel (using a busbar) to one another, maintaining the 48V voltage, but together would be able to provide the amp draw the buggy pulls when going up hill or towing a rake (rated 320 max continuous Amps). This is in comparison to the serial connection the eight 6V lead batteries. Each of the EAGL batteries looks to have its own BMS; am I correct in thinking I will have to use their included charger rather than (simply) changing the onboard charger to lithium mode? The chemistry of the pack is LiFe PO4, for what it's worth. I haven't torn anything apart yet (to diagram), so I am not sure how the dash will interpret the AMP draw, but the kit I am looking at includes a dash mounted charge indicator.
If anyone has completed a similar conversion, do you have any tips? Specifically, how did you remove the original batteries, and how did you secure the new ones? I am guessing that almost any change from the stock batteries would involve at least some modifications. Any tips would be appreciated, especially things I may have failed to consider. Thanks!
-
 By KnS
Hey Team, our issue is not as bad as some I've read here... We put some songs one a 64GB USB stick, plugged it in and the USB icon is still greyed out and won't let you select. Any suggestions? All the songs are in the root directory. Thanks, Kevin & Shelbie
-
-
 By Jon Spruill
Hey Guys, I have been chasing a stalling condition for about two weeks now. The bike will crank up and idle fine, then after about 20 seconds it will fall on its face and stall. It happens at both idle and while running at various rpms. You can turn the key off, turn it back on and it will fire right back up without trouble. I have verified spark on both cylinders with a spark tester. I have also added an inline fuel filter, and pulled the injectors to verify proper pulse on each. Things I have replaced - (relearn procedure performed after each component replaced): spark plugs, ECU, relay/fuse box, fuel pump, & throttle position sensor - all with no improvement of the condition. The only warning light I get when the condition occurs is the oil lamp. The bike only has 14 miles. I am at a loss and appreciate any help and suggestions! Thanks
-


Recommended Posts
Join the conversation
You can post now and register later. If you have an account, sign in now to post with your account.
Note: Your post will require moderator approval before it will be visible.