


-
Similar Topics
-
 By UTVLover253
Hey everyone – my name is Adam and I’m doing some market research to better understand the ATV / UTV community. I'm especially interested in hearing about:
What you use your vehicle for (work, play, etc.)
What you love about it
What frustrates you
What the overall experience of riding has been like
If you're open to hopping on a casual 30-minute Zoom or phone call sometime this week or next, I’ll send you a $100 gift card as a thank-you.
No sales, no pitches—just listening and learning. I'd also just ask that you send over a photo of you and your side-by-side in action (nothing formal—trail pics or selfies are totally fine!).
If you're down to chat, drop a comment or DM me and we’ll find a time that works. Would really appreciate the chance to learn from you 🙏
Thanks!
– Adam
-
 By BMurph
Hello everyone! I am new here and have no experience with UTVs but I am quickly getting some. I have a shifting problem where I can shift through all gears without the engine running but as soon as I start the engine I can not select a gear. Yes, foot is on the brake and yes the pin is being pulled to go into reverse if I was to try going into reverse. The shift lever does not move. I adjusted the linkage to get more accurate shifting with the engine off so I know those are now correct. I opened the shift lever housing to inspect the teeth on the gear and found this picture below. Why is this oil so milky looking? I assume with oil like this I'll need to replace the wet clutch as well but am not positive. Does anyone have any input into how to flush this system and get things shifting correctly? Thanks in advance for all the help!
-
By BMurph
Hi everyone. I am new here to the forum and am excited to learn from all of you with more experience than me with UTVs. Our Axis750 we use on the hobby farm started to have some issues going into gear. Yes, foot is on the brake and completely stopped as required with these machines. I thought it was the linkage and adjusted it to where it is accurately shifting with the engine off and key in the on position. I start the engine and it won't shift gears (yes foot is on the brake). I thought maybe it was the shift lever teeth so I opened the assembly and this picture shows what I just found. I assume this means the wet clutch would need replaced too while draining and flushing the oil. What else should I consider or be looking at? Any idea what could cause this? I don't see visible leaks or cracks in the system anywhere. Thanks in advance for the help!
-
 By Alien10
This is the E Brake, the one that is on the center drive shaft rotor below the dump bed. It is NOT related to any of the wheel disc brakes.
A few months after purchasing my Coleman Outfitter 550 (Hisun) new, the E brake stopped working. Thought it had got water or oil on it as it gradually went from good holding to poor holding to literally NO holding. Been lazy using a piece of 4x4 to keep from rolling, but that's a pain. So, into the barn I went with work light to see what the heck is wrong. E brake pedal worked, but hit a hard stop and felt like the cable was froze up from rust but that was not the case. As it turns out the E brake is actuated by some kind of weird actuator lever/cam arrangement based upon the actuator lever being moved about 15 degrees from its fully released position. That makes the adjustment pretty critical with such little movement. Bolt "C" in the pic below is the adjustment bolt, held in place by lock nut "B". Working from below, here is what I did.
Removed the skid plate below the E brake. 6 bolts and washers. Next, looked at the brake pads which still had a good amount of pad left on them. Looked to be a little less than 1/8" each. Verified that the cable from the E brake pedal "A" actuated the E brake arm "D". Cable "A" pulls and released lever "D" in the direction of the curved arrow. Applied E brake and checked the actuator arm, it was all the way up with no bare cable "A" showing. Released E brake and checked the actuator arm, it was all the way down with bare cable "A" showing as in the pic below. That spring pulls the lever to fully released position. Note: I disconnected the release spring from at the lever with needle nosed pliers to make working with the adjustment easier to do without that pressure on the lever. With E brake released, loosened lock nut "B" and backed it off the lever about 1/8" or so. Tightened adjustment bolt "C" by hand just until it stopped. Retightened lock nut "B". E brake now holds securely on my hillside driveway, and releases completely. Reinstalled skid plate. Hope this might be of some help to someone as none of this is in the owner's manual or in diagrams.
up.
Released brake and rechecked the actuator arm, it was all the way down.
-
-
 By SouthernGypsy
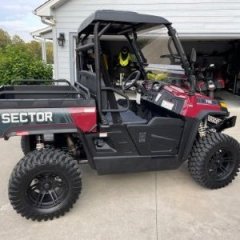
We have a 2018 Cub Cadet Challenger 400 and I found this Internally Threaded Bolt with a 10mm head size laying in the floor of the shop bay here on our ranch where we park the Cub Cadet.
Trying to figure out where it belongs...
-


Recommended Posts
Join the conversation
You can post now and register later. If you have an account, sign in now to post with your account.
Note: Your post will require moderator approval before it will be visible.